Select the specs for your order and get instant pricing
Material
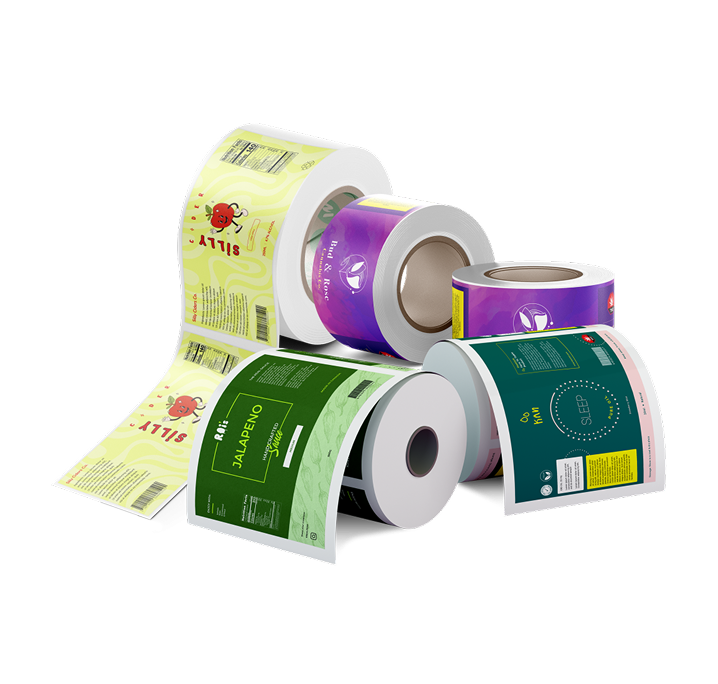
Material refers to the (facestock) substrate on which printing occurs. We currently offer six types of material: Gloss White Paper, Gloss White Plastic, Silver Plastic, Clear Plastic, Estate #4 Permanent Paper and Silver Paper.
💡 Pro tip: For waterproof labels, we would recommend Gloss White Plastic or Clear Plastic.
Color
Color refers to the ink that is used on the labels. We currently offer four options:
Full Color (CMYK): Standard ink colors for printing; cyan, magenta, yellow and black
CYMK + White: Standard ink colors with the addition of white ink (used on non-white label materials)
White Only: White ink only (used on non-white label materials)
Black Only: Black ink only
White ink is a great way to add a bit of uniqueness to your project. To set it up, you can refer to the white ink setup guide here.
Shape
Shape refers to the shape of the labels once they are removed from the roll. We currently offer four standard shapes as well as custom shapes. For custom shapes, please ensure your file’s dieline is set up correctly based on our roll labels dieline setup guide.
The minimum diameter requirement is 0.25 inch.
Finishing
Finishing refers to the coating, which is protective layer applied to the label material. We currently offer four types of finishing:
Gloss Lamination: A protective layer that provides added durability. Makes the label look more vibrant and glossy
Matte Lamination: A protective layer with a non-glossy finish and a smooth texture. Reduces glare and adds durability
Gloss UV: Adds a glossy shine to the finished product
Matte UV: Creates a non-glossy or dull sheen to the labels.
Uncoated (None): No coating or lamination
Wind Direction
Also referred to as roll direction, it is the direction in which the labels are dispensed from the roll. We currently offer four wind directions: right, bottom, top and left.
💡 Pro tip: When choosing your wind direction, use your artwork as a visual aid to determine where it makes the most sense to dispense the label.
Labels Per Roll
You can specify how many pieces you would like on each roll. Choose from 50, 100, 250, 500 or 1000 labels per roll.
Material
Material refers to the substrate on which printing occurs. We currently offer three types of material: White PE, Metallic PET (METPET + Clear PE) and Clear PE.
💡 Pro tip: For moisture-sensitive products, we would recommend Metallic PET.
Color
Color refers to the ink that is used on the roll stock. We currently offer three options:
Full Color (CMYK): Standard ink colors for printing; cyan, magenta, yellow and black
CYMK + White: Standard ink colors with the addition of white ink (used on non-white label materials)
White Only: White ink only (used on non-white label materials)
White ink is a great way to add a bit of uniqueness to your project. To set it up, you can refer to the white ink setup guide here.
Repeats Per Roll
You can specify how many times you would like your artwork repeated on each roll. Choose from 500 to 50,000 (optional).
Lamination
Lamination refers to the protective film that is applied to the roll stock material. We currently offer three types of lamination, all made from PET material:
Gloss Lamination: Enhances the design’s appearance, making it more vibrant and glossy
Matte Lamination: Helps to reduce glare in order to make text in the design more readable
Soft Touch Lamination: Provides a non-glossy finish with a smooth texture. Reduces glare to make text more readable
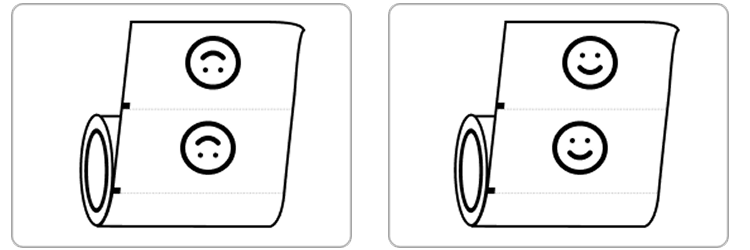
Roll Direction
Also referred to as wind direction, it is the direction in which the artwork is dispensed from the roll. We currently offer two roll directions: outside wind top, and outside wind bottom.
💡 Pro tip: When choosing your wind direction, use your artwork as a visual aid to determine where it makes the most sense to dispense the label.
Material
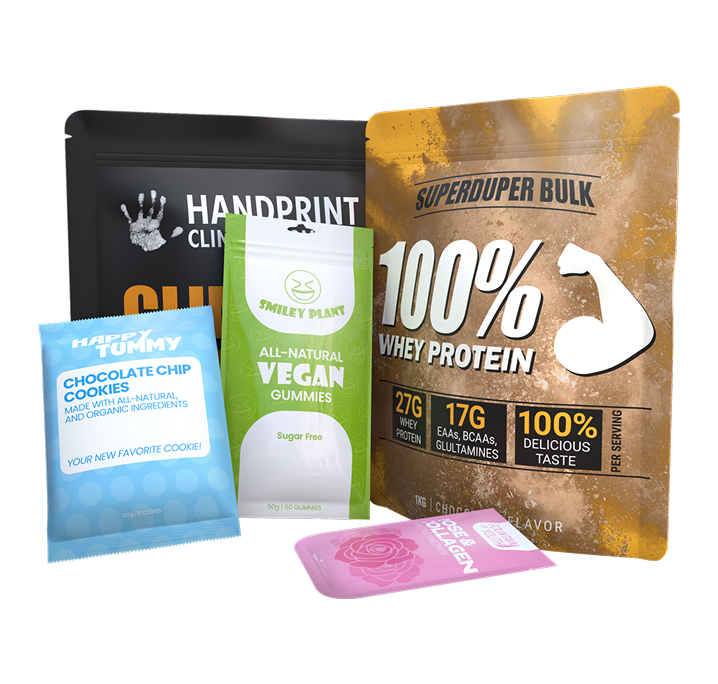
Material refers to the substrate on which printing occurs. We currently offer three types of material: White PE, Metallic PET (METPET + Clear PE) and Clear PE.
💡 Pro tip: For moisture-sensitive products, we would recommend Metallic PET.
Color
Color refers to the ink that is used on the pouches. We currently offer three options:
Full Color (CMYK): Standard ink colors for printing; cyan, magenta, yellow and black
CYMK + White: Standard ink colors with the addition of white ink (used on non-white label materials)
White Only: White ink only (used on non-white label materials)
White ink is a great way to add a bit of uniqueness to your project. To set it up, you can refer to the white ink setup guide here.
Zipper
You can choose to include a zipper to make your pouches resealable. Options include a standard zipper, or a child-resistant zipper.
💡 Pro tip:Some products are legally required to have a child-resistant zipper on their pouch packaging.
Lamination
Lamination refers to the protective film that is applied to the pouch material. We currently offer three types of lamination, all made from PET material:
Gloss Lamination: Enhances the design’s appearance, making it more vibrant and glossy
Matte Lamination: Helps to reduce glare in order to make text in the design more readable
Soft Touch Lamination: Provides a non-glossy finish with a smooth texture. Reduces glare to make text more readable
Hang Hole
We can make a standard circular cut at the top of the pouch for hanging your product on retail displays (optional).
Tear Notch
Tear notches (optional) are small, convenient, pre-cut openings, which allow users to easily open the packaging with additional tools.
Coming soon!
STEP 3: Upload Your Artwork
Follow our artwork preparation guide and upload your files
File Setup
Format: Set up the file for print in PDF format (file extension: .pdf)
Remove hidden layers: Be sure to DELETE any hidden layers that are not intended to print (ie: setup guide layers or other hidden artwork layers) to ensure no risk of them appearing on the final print.
Orientation: Files must be submitted with proper orientation to ensure proper back up.
Clean files: Do not supply files with linked images, form fields, comments, or annotations, as these will not be printed.
Outline needed: All type must be outlined (not embedded)
Design Specifications
Avoid borders: It is best to try to avoid using borders in your design. If a border is too close to the trim, the trim may be slightly off-center.
Vector only artwork: Please provide vector only artwork for type, logos, shapes and all other artwork. Only provide embedded raster artwork for actual 4-color images.
Trim and bleed size: The trim size of the Illustrator file must match the final trim size of the label. Use bleed settings in Illustrator of 0.0625 inches minimum on all the edges.
High res: Ensure that your PDF is high res and that all images are CMYK at 300 DPI.
Color Management
CMYK (Full Color): File should be CMYK only (no RGB) with a Dieline and/or White_Ink spot color depending on your order specifications.
Black Only: If you select Black Only option on your order, the file you supply should be K only (not CMYK or RGB) with a Dieline and/or White_Ink spot colors depending on your order specifications.
Black Values: Black type should have the following values: C0, M0, Y0, K100.
Setup Guides
Artwork Preparation Checklist: This handy list helps you ensure that your file has every ready to go into production. Download here.
Artwork Requirements: This guide goes into depth on what is required of your file for best print results. Download here.
Dieline Setup: If your packaging requires a custom shape, you need to create a custom dieline. This document explains how it needs to be set up. Download here.
White Ink Setup: If you want to print white ink on a non-white material, you will need to set up your file correctly. This document explains how. Download here.
Custom Shapes and White Ink
Dieline layer: If file contains a dieline, it must be a separate spot color called Dieline and be on its own layer.
Single path stroke: The dieline shape must be a single path stroked.
Single file: Please supply a single file that includes CMYK (if necessary) and a spot color called exactly White_Ink. Do not supply separate files for CMYK and White Ink.
White ink overprints: If you want white ink to print under a different color, you need to set either the different color or the White_Ink shape to overprint to achieve this.
Knockout: You may also want to set a White_Ink shape to knockout so nothing prints on top of it.
Overprints: Remember to set overprints on any Dieline.
STEP 4: Place Your Order
Place your order and choose between pick up or shipping options
Checkout Instructions
1. Review Your Cart: Check your order summary to confirm your selections
2. Shipping Information: Enter your shipping address and choose your preferred shipping method
3. Payment Details: Provide your payment information, then place your order
Once your order is submitted, you’ll receive a confirmation email letting you know we’ve received it successfully.
Next, your artwork will be reviewed by our prepress team to ensure it’s print-ready. If any issues are found, we will notify you via email so that you can update your file accordingly.
Please note: Any changes to your artwork or order specifications, as well as file issues, may result in a delay. Please check all files and specifications carefully before placing your order.
After your artwork is approved, we’ll send a final confirmation along with your estimated shipping or pickup date.
Still Have Questions?
Can’t find the answer you’re looking for? Get in touch with our support agents.